Where Bloggers Create Party ! And a Little How To Treat
I am back from the gorgeous Smokey Mountains, and excited about the
"Where Bloggers Create "
Blog Party!
Now, that I am 2/3 of an empty nester I decided to move all of the non -metal
parts of the studio to one of the empty bedrooms upstairs. This mostly means
all of the the doll and animal friend parts , vintage do hickies,
painting supplies,
and loads of canvas and wood substrates.
It is turning out to be a slow move , as I am still carefully mapping out the space.
My goal of course is to have everything in its own special place.
Still plenty of spaces to fill, but it won't take long .
My jars, and jar ladies ,
had to come with me right away of course. Holding, all of the Pan Pastels,
charcoals, and pens, and parts!
doll parts!
Doll shaker collection.
My son has welded fantastical, mechanically moving, holders for my brushes !
doll parts!
Doll shaker collection.
My son has welded fantastical, mechanically moving, holders for my brushes !
And, the yummy oil sticks have found homes in some vintage vessels.
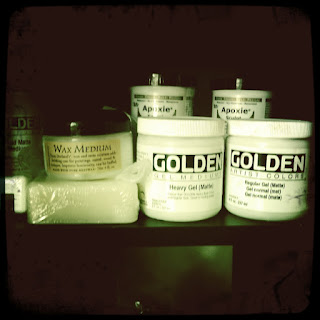
All of the gel pastes, waxes, clays . I didn't realize until now that I actually
"collect " Golden products LOL.
ALSO THIS WEEK.....
I also have a super easy and fun
"How To"
for you this weekend!
ALtered Milk Carton House Journal Book!
Items you will need:
Milk Carton
ribbons
paints (acrylic)
card stock
little bits of ephemera, or decorative papers
stamps
Matte Gel medium or modge podge
optional : soft pastels, oil pastels, ink pads, Pan Pastels
Your imagination! Let loose and have fun!
Take a regular milk carton ,
and cut it open and remove bottom . Cut it
down one side , so that it lays flat.
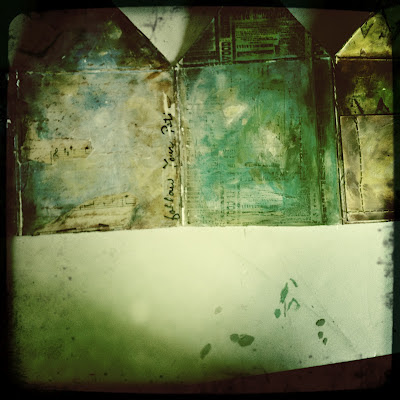
I I followed the folded pattern already in the milk carton , and cut this house shape.
The house symbol is very important to me, and it seems to find
it's way into a lot of my artwork.
Milk cartons measure approx 8 in long in the rectangular center portion. I measured and cut mine in half
for a smaller book that was easier for me to work with , but you can leave yours tall
if you would like a bigger journal.
I then added 2 coats of Gesso to the front and back of the book, and let them
dry thoroughly.
dry thoroughly.
At this point , you can sand it a little , or leave the brush strokes so that it has
some "tooth" for your paint.
Then go wild! I added vintage sheet music bits , acrylic paints, and my
favorite ink pads for color. I applied the ink pads directly on the pages , and smoothed them
around with my fingers , blending them with more gesso for a soft dreamy effect.
around with my fingers , blending them with more gesso for a soft dreamy effect.
Next I added stamps , and more inks
For blending on this fun little journal I used paper towels, soft baby wipes, or sometimes
my fingers. I know that is a no no on your formal paintings , but this is a fun
journal . Get messy , and enjoy!
For extra interest I sewed on atc cards as pocket holders .
They were the perfect size!
just popped them in the sewing machine
I have had these what's a magiggies for a long time. I think they are
old blank slide holders. I used them as windows to frame
my favorite words, and images in the book.
The same windows can be achieved with
just a circle punch , some chip board, and small piece of acetate.
Added the girl on the front the same way . I glued this one to a
painted small wood dowel
(I actually used a kitchen skewer, but it
sounds better the other way :) , and placed her in front pocket.
I added some quotes, inspirations , and my FAVORITE
yummy silk sari ribbons.
One thing I found ,is that you need to let each layer dry thoroughly either on its own or with
air gun /dryer help. The waxy coating on the milk carton will want to make your paint come off if
you get too much going on in each layer. Also , charcoal pencils etc. tend to take it up even if its
dry. I used soft pastels, and Pan Pastels , and inks where I wanted highlights or shading.
For all of my adhesive , I used Golden Matte Gel Medium. You
can also use this to seal it when it is complete. Especially if you are using
soft pastels etc.
This is also a super fun project to do with your kids. Its
great to see what color schemes ,and fun patterns they come up with!
This project can be made as simple or get intricate as you want, adding secret pockets,
extra fold out papers, trinkets, vintage buttons, keys etc.
This is a project , that I will probably keep coming back too , as I find fun vintage do`dads to add on!
If you have any questions at all about this fun project , leave it as a comment or email me !
Blessings,


